How to Enable Notifications for Users
Updated: February 23, 2025
Ever had a teammate miss an important booking update or refund request? Keeping everyone informed is crucial to smooth operations, and with TicketingHub’s user notifications, you can make sure the right people get the right updates—without flooding their inboxes with unnecessary alerts.
Here’s how to enable notifications for your team in just a few clicks:
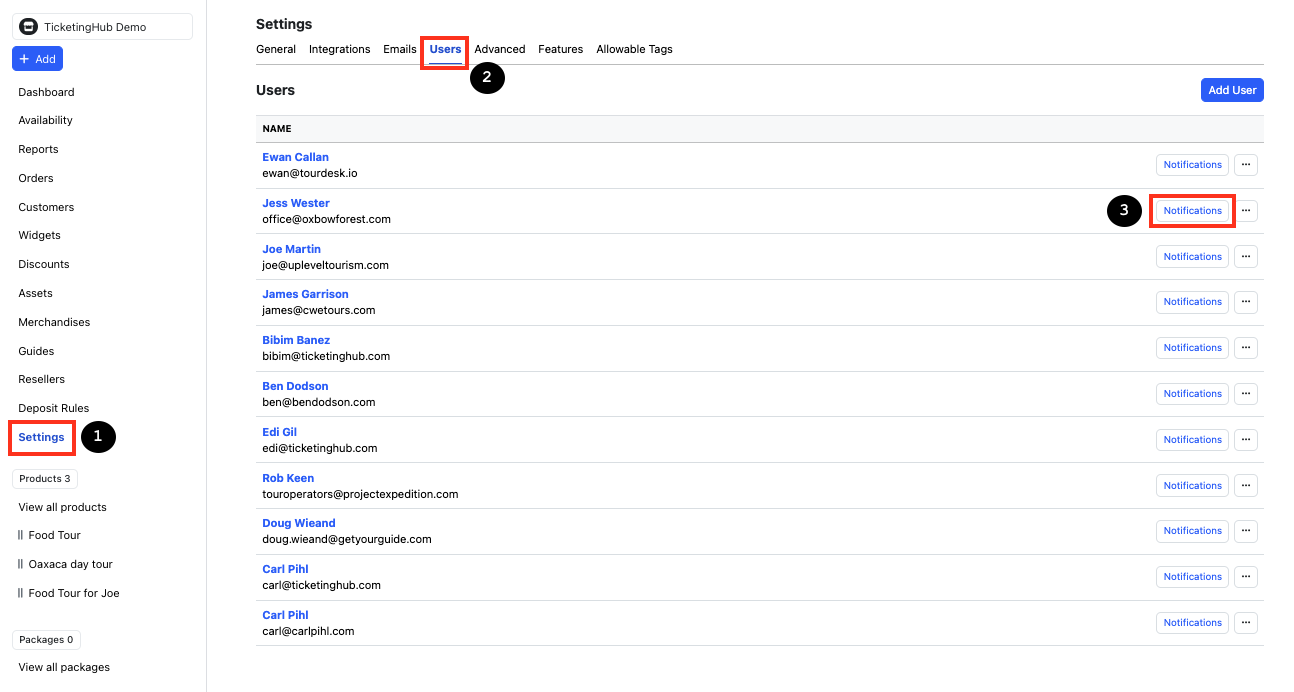
Go to Settings in your TicketingHub dashboard.
Navigate to the Users tab—here, you'll see everyone with access to your TicketingHub account.
Find the user you want to update.
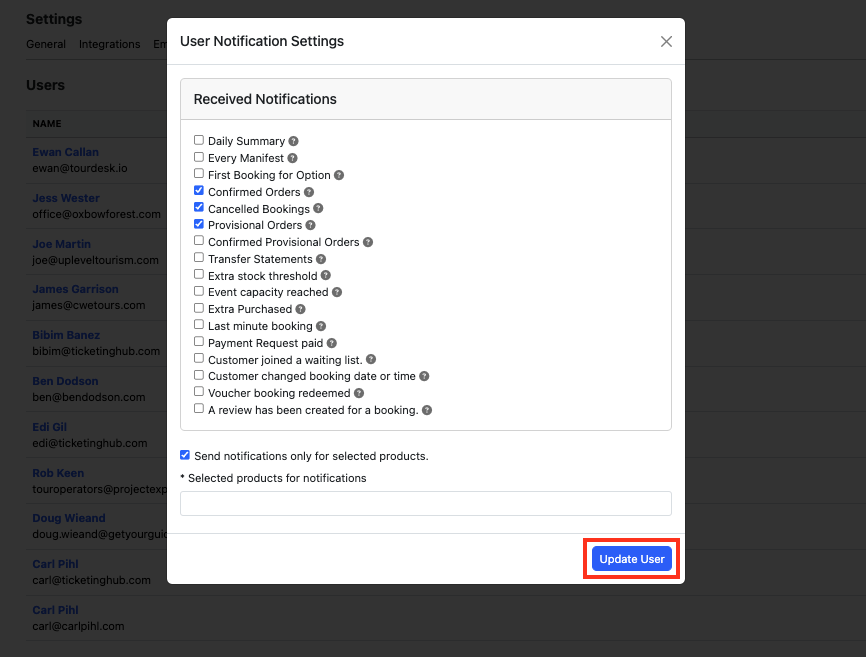
Click on the Notifications button—this will open the User Notification Settings pop-up window.
Select the notifications you want this user to receive.
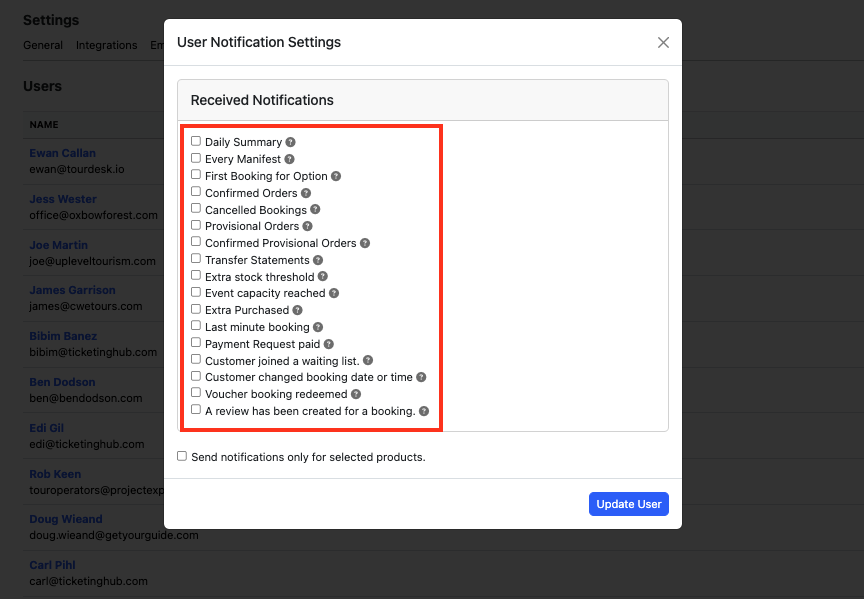
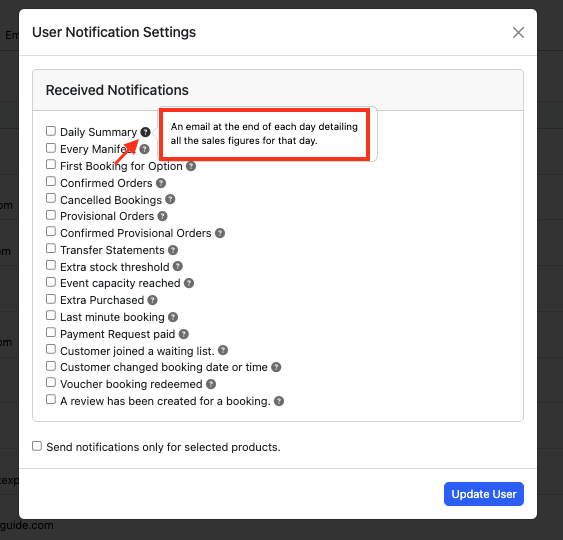
TIP: Hover over the question mark icon next to each notification type for a quick explanation of what it does.
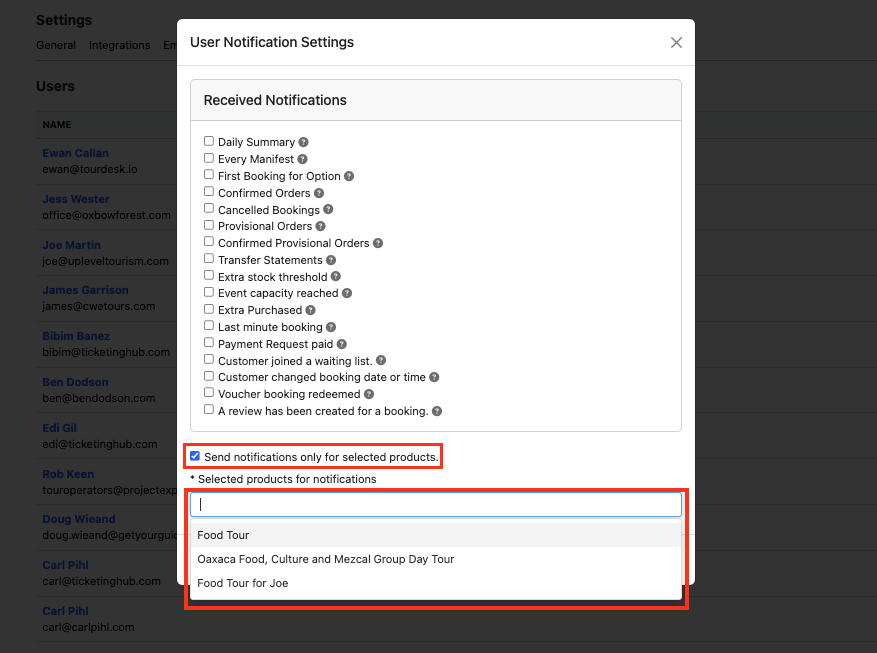
If you only want this user to receive notifications for certain products, check Send notifications only for selected products.
Select the relevant product(s) from the drop-down list.
Review the new notification settings.
Click Update User to apply the changes.
With custom notifications, your team stays informed without being overwhelmed—so everyone can focus on what they do best. If you’re still unsure, our team is always here to help. Please reach out to us anytime!
Ever had a teammate miss an important booking update or refund request? Keeping everyone informed is crucial to smooth operations, and with TicketingHub’s user notifications, you can make sure the right people get the right updates—without flooding their inboxes with unnecessary alerts.
Here’s how to enable notifications for your team in just a few clicks:
| Steps |
|---|
| 1. Access User Settings |
| 2. Enable Notifications for a User |
| 3. Customise Product-Specific Notifications |
| 4. Save Your Changes |
Steps to Enable Notifications for Users
Step 1: Access User Settings
Go to Settings in your TicketingHub dashboard.
Navigate to the Users tab—here, you'll see everyone with access to your TicketingHub account.
Step 2: Enable Notifications for a User
Find the user you want to update.
Click on the Notifications button—this will open the User Notification Settings pop-up window.
Select the notifications you want this user to receive.
TIP: Hover over the question mark icon next to each notification type for a quick explanation of what it does.
Step 3: Customise Product-Specific Notifications
If you only want this user to receive notifications for certain products, check Send notifications only for selected products.
Select the relevant product(s) from the drop-down list.
Step 4: Save Your Changes
Review the new notification settings.
Click Update User to apply the changes.
And That’s It!
With custom notifications, your team stays informed without being overwhelmed—so everyone can focus on what they do best. If you’re still unsure, our team is always here to help. Please reach out to us anytime!
Updated on: 24/02/2025
Ich danke Ihnen!